Images can make forms more intuitive for users when they are filling them out. Most forms can’t be adjusted to have images but choosing from a list of options can make the whole process more user-friendly. We are going to use User Profiles as an example.
I’m talking about radio buttons, checkboxes, dropdowns and lists. Items that require the user to choose from a selection of options. Adding animation into all of that can take it that one step further.
What’s involved
We will be building this mostly in HTML and CSS, but we require a little JavaScript to toggled active states when clicked. But the animation is done in CSS and with SVG’s.
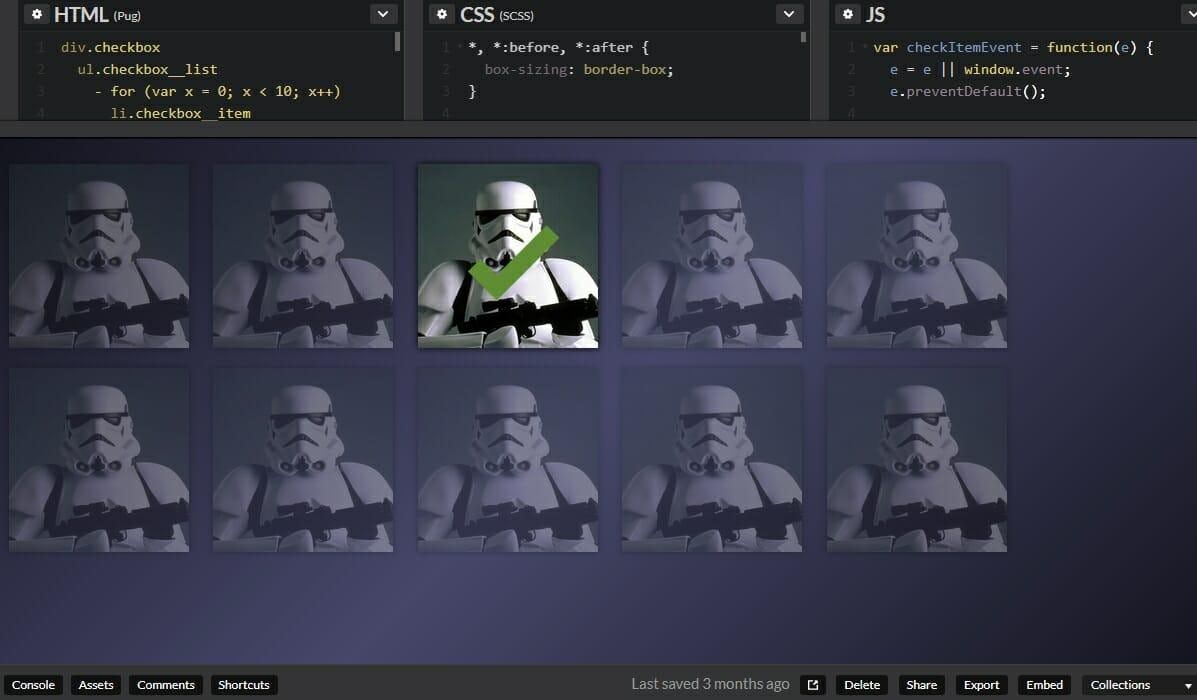
Animated profile tick selector
This does exactly what it says on the tin. This demo gives you a list of images, from which the user needs to select one. We then need to indicate which image has been selected and make it clear.
You don’t have to stick with only allowing 1 item to be selected, that is just what I am going to do in this demo. Also, if I happen to get lazy and use the same image multiple times, I’m sorry,
Creating the list
First things first, we need to create the main wrapper, include an unordered list, and then build a load of list items.
Go ahead and create as many List Items as you want. If you want to build it in Pug, it would make it even easier
Adding the Tick
For our tick to be animated, we can create a tick shape out of spans and divs, but we are going down the SVG route. Mainly because SVG’s are cool and would allow you to animate a much more complicated shape in the future.
Unfortunately, you will need to put this SVG to every list item. An easy way around this is if you are using some server-side scripting or JavaScript, you can loop through each list element.
Setting the default style
The first thing we are going to do is set the default styling for everything, making use of the border-box property.
Setting the list style
Next up is setting the minor setup we need for the list wrapper, which just removes the default bullets and padding.
Styling the profile items
The actual profile images are, for this example, only going to be set as the same background image. You can modify this later to use different background images.
The above code allows us to display everything in a line, and gives us a nice white background as a default. it also goes ahead and sets some margins for us to space everything out.
Next up for us is to add in the background image.
Your image should now fit the area and be centred. Lastly for this section is to add some back shadow, and set the transition ready for the animation.
Set the different states
OK, you should now have the main display all set, and the only thing left to do, CSS wise, is get all the states set and animation working. At this point, it all becomes very simple.
So, the first states you need to add are the active and inactive states of the list item. The styling for those look a little like this…
Styling the tick
The final states are to animate the tick in the “swish” style. First, we need to quickly add in these default styles so that the SVG looks and fits into the box.
It basically sets the starting opacity to invisible, adds some drop shadow and tells the stroke how we want it to look.
Now we need to add in the active state style. Requirements are to set the opacity to visible and call the animation sequence we’ll create shortly.
Last part of this section is to actually create the keyframes of the animation. I’m only going to display the basic keyframes, and not all the browser vendor prefixing. They are available in the demo.
That is your animation sorted. If you want to test, you can toggle the required classes on and off in the console. But to active those from a click event, we’ll need to incorporate some JavaScript.
Adding the JavaScript
First, we need to create the function that will be called on every item click. This function will find all of the profiles, remove any active or inactive states, before marking each one inactive. Once everything is clear, it marks the item clicked as active.
The last part of the project is to collect all of the items, which we have marked with a class of .checkbox__item, and apply an Event Listener to each one to call the function above on click.
And that completes your profile.
Demo
See the Pen Animated profile tick selector by Dean Pugh (@wezlar) on CodePen.
Conclusion
This is a fairly simple setup, but gives a nice effect. One good change to make would be to change the SVG tick for a FontAwesome icon. Tracking the tick effect might make it difficult.